I have recently found myself in possession of a rather large amount of carrots, so naturally I have been looking for ways to use them up. This soup turned out delicious! This recipe is enough to make a family sized batch. If you don't need as much, you can cut the recipe in half and still have plenty.
Creamy Carrot Crock Pot Soup
10 cups carrots - peeled and sliced
6 cups water
6 bouillon cubes
1/4 cup butter
2 tbsp Italian seasoning
1/2 tsp cayenne pepper
2 - 8 oz packages of cream cheese
8 strips of cooked bacon
Place carrots, water, bouillon cubes, butter, Italian seasoning, and cayenne pepper in crock pot. Stir to mix the spices in. Cook on high for approximately 5 hours, or until carrots are soft. Using an immersion blender or regular blender, blend together the ingredients until smooth. Cube the cream cheese and add to the mixture. Blend well. In another pan, cook bacon. Cut into small pieces, add to the soup and mix well.
Showing posts with label Meal Planning. Show all posts
Showing posts with label Meal Planning. Show all posts
Tuesday, February 18, 2014
Friday, November 4, 2011
It's Time For The Annual Safeway Turkey Sale

Ad picture from http://www.safeway.com/
Every year, Safeway sells Thanksgiving turkeys for pretty much unbeatable prices. You can always buy just one turkey for your Thanksgiving meal, or you can take advantage of the sale to have very affordable poultry for the rest of the year. If you have the storage, this is a great opportunity to stock your freezer. If you don't have the storage, you can always cook your extra turkeys right away, then take the meat off of the carcass and freeze the cooked meat in storage bags or containers. You'll still have the extra meat, but it won't take up as much space. In the past, we have used all of the extra turkey for things like sandwiches, turkey noodle soup and turkey noodle casserole. You can use almost any recipe that calls for chicken and insert turkey in its place.
For the sale this year, the terms and conditions have changed a little bit. It used to be that a minimum purchase of $10 was what would qualify you for the good deal. This year, the minimum purchase is $25. The prices on the turkeys have also gone up a little bit, but broken down to price per pound, it is still a really good price for meat- it averages out to be from $.50 to $.87 per pound, depending on which turkey you buy. That is an incredible deal! The turkey prices are $6.99 for an 8-12 pound Safeway turkey, $7.99 for a 12.01-16 pound Safeway turkey, $9.99 for 16.01-20 pound Safeway turkey, and $11.99 for a 20.01-24 pound Safeway turkey (these are the prices according to my local Safeway ad - you may want to check your local ad at http://www.safeway.com/ to be sure of the prices in your area). Each turkey is limit one per household per day, but you can buy one of each kind at the same time. This sale is good through November 24th.
As far as cooking the turkey goes, we have found that an electric roaster is the best way to go. It saves energy costs because it is a smaller appliance, and it also cooks quite a bit faster. The awesome turkey recipe I use is posted here. My turkeys have turned out excellent every time I have used it.

Tuesday, October 4, 2011
Oatmeal Banana Bread Bars
We always seem to have a few more bananas than we can eat before they go bad. I came up with a new recipe to use those extra bananas. It has a slightly different texture than the same old banana bread we usually make - bread like, but also like a bar.
Oatmeal Banana Bread Bars
1 cup softened butter
3 mashed bananas
2 eggs
1 cup whole wheat flour
3 cups quick oats
1/2 cup sugar
1/2 cup honey
1 tsp baking powder
1/2 tsp baking soda
1/2 tsp salt
2 tsp cinnamon
1/4 tsp nutmeg
1 cup chocolate chips
Preheat oven to 375 degrees. Beat together butter, banana, and eggs. Mix in the remaining ingredients, except the chocolate chips. Fold chocolate chips into the batter. Bake in a greased 9 x 13 pan for 30 minutes.
Monday, October 3, 2011
Spicy Roasted Pepper Hummus

We have been using the hummus as a dip for pretzels, and I also spread some on a tortilla and rolled it up for a snack. Many people also use it as a veggie dip. It is an incredibly nutritious dip to make, and it is a nice source of protein and fiber.
Spicy Roasted Pepper Hummus
2 bell peppers, de-seeded and cut in strips
1/4 cup olive oil, plus extra for drizzling peppers
6 cloves of garlic
2 - 15 oz cans garbanzo beans, drained
1 lemon - juiced
1/4 cup peanut butter
1/2 cup water
1 tsp crushed red pepper
1 tsp salt
1 tsp paprika
1/4 tsp cayenne pepper
2 tbsp dried parsley
Preheat oven to 450 degrees. Place strips of bell pepper on a cookie sheet, drizzle with olive oil. Bake for 10 minutes (will be brown around edges). Remove and let cool. In a blender or food processor, chop garlic cloves. Add garbonzo beans, lemon juice, olive oil, peanut butter, 1/4 cup of the water, crushed red pepper, salt, paprika, cayenne pepper, and parsley. Blend until smooth, stopping occasionally to scrape sides of blender/food processor. Add roasted pepper strips a few at a time, as well as the remaining water, until mixture is blended well. Transfer mixture to a bowl or storage container.
Saturday, October 1, 2011
Ranch Zucchini & Tomato Crockpot Recipe
Every year, my neighbor seems to grow an abundance of zucchini. Not just any zucchini - these are ginormous zucchinis! She often sends some of these zucchinis my way. In years past, we have made tons of breads, and I am always on the lookout for new ways to use them. My garden this year happens to be putting out quite the crop of tomatoes (well, for us anyhow!). With the abundance of tomatoes and zucchini around here, I wondered if I could come up with a yummy recipe that incorporates both. It turned out wonderfully delicious! I was able to get two different batches of this recipe made out of one of my neighbor's gifted zucchinis (seriously, they are huge!), so I figured one large zucchini, or even several smaller ones, would be just about enough to make this dish. I hope you like it as much as we do!
Ranch Zucchini & Tomato Crockpot Dish
24 oz Sour Cream
1 oz package of Ranch Dressing/Seasoning Mix (such as Hidden Valley)
8 oz Shredded Cheese
1 lb Hamburger, browned
1 Large Zucchini, peeled, de-seeded, and sliced
5-6 Large Tomatoes, sliced
Mix sour cream and ranch dressing/seasoning together. In bottom of crockpot, spread a little bit of the ranch sour cream, enough to cover. Layer zucchini, tomato, hamburger, ranch sour cream, and cheese - lasagna style. Keep layering ingredients, ending with the ranch sour cream and cheese on top. Cook on high crockpot setting for around 5-6 hours, or until zucchini is tender.
Sunday, September 11, 2011
Mixed Berry Crisp Recipe
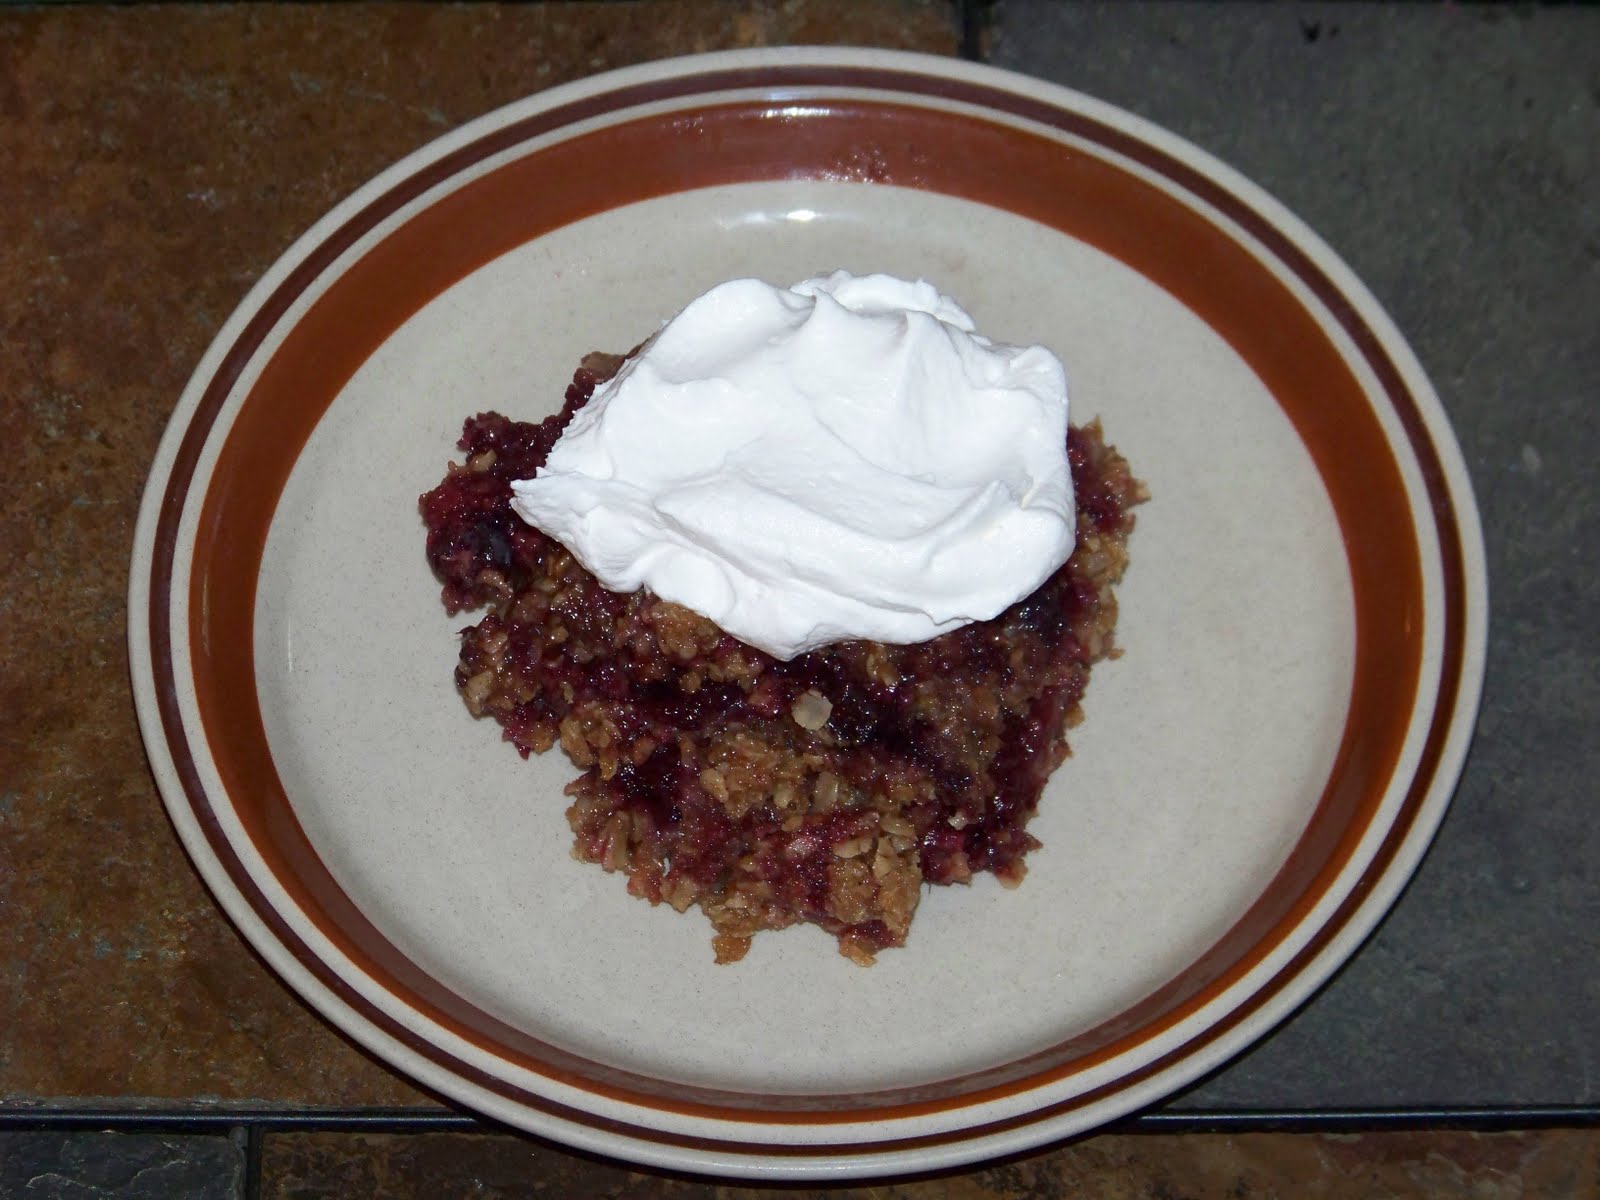
Mixed Berry Crisp
4 1/2 cups berries of your choice
1/4 cup honey
1 cup whole wheat flour
3 cups quick oats
1 1/2 cups brown sugar
3 teaspoons ground cinnamon
1 1/2 cups melted butter
Preheat oven to 350 degrees. In a large bowl, mix berries and honey together, set aside. In another bowl, combine flour, oats, brown sugar, and cinnamon. Mix well, then add melted butter. Continue to mix until crumbly. Place half of the mixture in the bottom of a 9x13 inch pan, pressing with a spoon to make a crust. Top the crust with the berry mixture, and spoon the rest of the oat/flour mixture on top. Bake for 35-40 minutes, or until top is golden brown.
Tuesday, August 16, 2011
Crockpot Salmon, Veggies, and Rice

Crockpot Salmon, Veggies, and Rice
2 cups brown minute rice, uncooked
2-3 cups chopped fresh veggies
1 cup water
1 cup Italian dressing, plus a little extra to drizzle on fish
Salmon
Place 2 cups of brown minute rice in the bottom of the crockpot. Place chopped veggies over the top. Pour one cup of water over veggies and rice, followed by pouring one cup of Italian dressing evenly over the top. Place salmon filet/s on a piece of tin foil (large enough to wrap fish in). Drizzle desired amount of Italian dressing over fish. Wrap in foil and place on top of veggies and rice. Bake on high for around 3 hours. Fish is ready when it flakes easily with a fork, and veggies are tender.
Wednesday, August 3, 2011
Double Chocolate Zucchini Oatmeal Cake
Recently, a friend brought me some zucchini from her garden. I didn't plant any zucchini this year, but every year it seems that friends and neighbors gift me some. It is an abundant crop around here! I am always looking for recipes and new ways to use my zucchini. I decided that I would like to try a very chocolately zucchini cake, with oatmeal. However, a recipe search for such a thing did not avail much. So I did what I always do when I can't find just the right recipe - I made my own! And besides, if my kids are going to eat chocolate cake, it may as well have vegetables and lots of fiber :-) I topped this cake with a simple cream cheese icing. It was yummy!
Double Chocolate Zucchini Oatmeal Cake
1 cup whole wheat flour
2 cups quick cooking oats
3/4 cup cocoa
2 tsp baking powder
1 tsp baking soda
1 tsp salt
1 cup brown sugar
1 1/2 cup butter, softened
1/2 cup honey
3 eggs
1 tsp vanilla
3/4 cup milk
3 cups shredded zucchini
1 cup chocolate chips
In a large bowl, combine flour, oats, cocoa, baking powder. baking soda, and salt. Mix well. In another large bowl, beat together butter, sugar, honey, eggs, and vanilla. Gradually add the dry ingredients, mixing well. Add milk and continue to blend until combined well. Mix in the zucchini, and then the chocolate chips. Pour batter into a greased and floured 9 x 13 cake pan and bake at 375 degrees for 60 minutes, or until an inserted toothpick comes out clean.
Tuesday, August 2, 2011
Crockpot Meatloaf and Rice

Crockpot Meatloaf and Rice
Meatloaf:
2 pounds ground beef
2 cups oatmeal
1 envelope onion soup mix
1 onion, diced
2 eggs
Rice:
2 cups brown minute rice
1 cup water
1 cup italian dressing
In a large bowl, combine all meatloaf ingredients and mix thoroughly. Place meatloaf mixture in the crockpot and form into a ring around the inside, leaving an open space in the center. In the center of the crockpot, pour two cups of brown minute rice. Pour one cup of water over the rice. Take one cup of Italian dressing and pour evenly over the meatloaf and rice. Cook on high setting for 5-6 hours.
Wednesday, July 20, 2011
Cabbage and Bacon Crockpot Soup Recipe

I was looking to use up a few grocery items and came up with this crockpot recipe. It was yummy! My six year old (who thinks she is allergic to vegetables) exclaimed after eating it, "Even though it had vegetables, I ate it anyway, and it was good!" I served this soup with buttered toast on the side.
Cabbage and Bacon Soup
1 small head of cabbage
1 bell pepper
1 15 oz can pinto beans - drained
1 onion
4 thick cut bacon slices - cooked and chopped into small pieces
6 cups water
6 chicken bouillion cubes
Chop vegetables and place in crockpot. Add the beans, water, and bouillion cubes. Stir in the chopped bacon pieces. Optional - to add more bacon flavor, add the leftover bacon drippings as well. Cook in crockpot on high for 5-6 hours.
Friday, October 8, 2010
Homemade Hamburger Helper
I haven't bought Hamburger Helper in quite a while because of how unhealthy it is. I can always find it on sale for about a dollar a box, but since trying to feed my family healthier meals, I refuse to buy the stuff anymore. I like the convenience and ease of making it, but the high sodium content, MSG, and preservatives are a no-go for our family anymore. I came across this blog post on making your own homemade Hamburger Helper with real ingredients. I thought I would pass it along for anyone else who might be interested. Here's the link: http://chickensintheroad.com/cooking/homemade-hamburger-helper/ .
Tuesday, October 5, 2010
Easy Meal Idea - Spaghetti Squash With Meat Sauce
If you are looking for a relatively easy, nutritious meal idea, try some spaghetti squash with meat sauce. Spaghetti squash is in season right now, so it is very possible that they may be on sale at your local grocery store. The texture of the spaghetti squash is stringy, kind of like spaghetti, so it can be a great vegetable substitute for spaghetti noodles. It has a mild flavor, and is delicious with a spaghetti meat sauce. It's very simple, basically you bake the squash, scrape it out of the shell with a fork, and then serve with spaghetti sauce and ground beef on top. Very yummy, simple, and nutritious! Here is a link for a good tutorial on baking spaghetti squash.
Monday, August 23, 2010
Canning Season

Some things to keep in mind when canning are safety procedures to ensure safe food, elevation considerations, and having adequate supplies. It is very important to research what you plan to can by using tested recipes and by studying proper canning methods. If food is not canned properly, it can become contaminated with botulism and cause serious illness. Some foods are fine being canned using a water bath canning method, others require pressure canning to ensure safe food.
When canning, you want to keep your elevation level in mind. Living in higher elevations require longer processing times to ensure proper food preservation temperatures. You can usually do an internet search to find out your elevation level, and proceed accordingly. Last, but not least, make sure you have the proper supplies. A water bath canner/pressure canner to use for processing, glass jars with lids and rings, a funnel, and a jar lifter or set of tongs for removing hot jars from the canner. The jars and rings can be saved and used again, but you will need new lids every time you can something new in a jar.
Here are some links for some good general information on canning:
http://www.hobbyfarms.com/food-and-kitchen/canning-fruits-vegetables-14786.aspx
http://www.hobbyfarms.com/food-and-kitchen/canning-fruits-vegetables-how-to-preserve.aspx
Here is a link for elevation guidelines:
http://canningusa.com/IfICanYouCan/TechniqueAltitudeAdjustment.htm
Monday, August 2, 2010
Yummy Crockpot Split Pea Soup
This recipe is rather unique, unlike any split pea soup I have ever had before. I really don't care for traditional split pea soup all that well, but this split pea soup I find to be quite delicious! It is different, but oh so yummy!
Split Pea Soup
2 cups green or yellow split peas, sorted and rinsed
6 cups water
1/2 cup dry sherry or apple juice
1 large sweet potato, peeled and cubed
1 large onion, chopped
4 cloves finely chopped garlic
6 bouillion cubes
3 cups firmly packed spinach leaves
1 cup heavy whipping cream
2 tablespoons fresh dill weed
Combine split peas, water, sherry/apple juice, sweet potato, onion, garlic, and bouillion cubes in crockpot. Allow to slow cook on low for 10-11 hours, or on high for 5-6 hours. Stir in spinach, cream, and dill. Cook for an additional 1/2 an hour.
I have also used a few substitutions in this recipe when I didn't have all the ingredients on hand. Sometimes I have used carrots in place of the sweet potato (about 2 cups), sometimes I have used regular milk or plain yogurt in place of the cream. It always ends up tasting great to me!
I adapted this recipe from the Betty Crocker cookbook entitled "More Slow Cooker Recipes".
Friday, November 27, 2009
Planning Meals
I have decided that I am going to try to be more organized and less wasteful by planning our meals. We are going to give it a whirl, and I am sure that this is a great way to reduce spending! I am hoping that this will help me use up things like fresh produce before it goes bad because I forgot that we had it. I am thinking it will also help me to utilize the ingredients in my cupboard as well, before I go out and get more! I have thought of doing this before, but have never gotten serious about it. I think it will also help me to plan ahead enough to avoid eating out as much as possible.
I found some awesome printable meal planning charts over at www.organizedhome.com/printable/household-notebook?page=1 . They have them for weekly or monthly menu planning. I am going to start out with the weekly meal planning form. I think doing the monthly one would be too overwhelming for me. I am also going to plan on having my family help me plan the meals by giving their input. By doing this, I think the transition to meal planning will go more smoothly and the family will be sure to have some of their favorites on the menu. I think I am also going to look around http://www.organizedhome.com/ some more, they seem to have lots of ideas and tools for being more organized, and their printables are free!
I found some awesome printable meal planning charts over at www.organizedhome.com/printable/household-notebook?page=1 . They have them for weekly or monthly menu planning. I am going to start out with the weekly meal planning form. I think doing the monthly one would be too overwhelming for me. I am also going to plan on having my family help me plan the meals by giving their input. By doing this, I think the transition to meal planning will go more smoothly and the family will be sure to have some of their favorites on the menu. I think I am also going to look around http://www.organizedhome.com/ some more, they seem to have lots of ideas and tools for being more organized, and their printables are free!
Subscribe to:
Posts (Atom)